This atricle explains how to enable PDF indexing and in browser viewing using the Adobe iFilter in Microsoft SharePoint 2010. Microsoft has also published an article on how to configure SharePoint 2010 to support Adobe PDF iFilter 9 for 64-bit platforms.
http://support.microsoft.com/kb/2293357
How to Install Search iFilter for Adobe PDF
To be able to search PDF documents you need to install the Adobe iFilter on the SharePoint 2010 search server.
Step 1: Download x64 install from ADOBE Site
http://www.adobe.com/support/downloads/detail.jsp?ftpID=4025
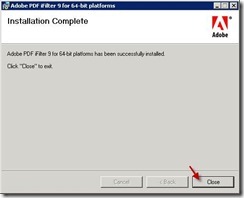
Step 2: Run install from ADOBE Site
When prompted for location install to the same drive as the SharePoint 2010 installation.
Step 3: Modify DOCICON.xml file
In Windows Explorer, navigate to C:\Program Files\Common Files\Microsoft Shared\Web Server Extensions\14\TEMPLATE\XML
Edit the DOCICON.XML file (I open it in NotePad, you can also use the built-in XML Editor)
Ignore the section <ByProgID> and scroll down to the <ByExtension> section of the file.
Within the <ByExtension> section, insert <Mapping Key=”pdf” Value=”pdficon_small.gif” /> attribute.
Save and close the file
Step 4: Copy PDFICON_SMALL.GIF to the folder
Download the Adobe PDF icon (select Small)
http://www.adobe.com/misc/linking.html
Give the icon a name or accept the default: ‘pdficon_small.gif’
Save the icon (or copy to) C:\Program Files\Common Files\Microsoft Shared\Web Server Extensions\14\TEMPLATE\IMAGES
Step 5: Add PDF to the list of supported file types within SharePoint
In the web browser, open SharePoint Central Administration
Under Application Management, click on Manage Service Applications
Scroll down the list of service apps and click on Search Service Application
Within the Search Administration dashboard, in the sidebar on the left, click File Types
Click ‘New File Type’ and enter PDF in the File extension box. Click OK
Scroll down the list of file types and check that PDF is now listed and displaying the pdf icon.
Close the web browser
Step 6: Restart IIS
Perform a full crawl of your index.
Note: An incremental crawl is not sufficient when you have added a new file type. SharePoint only indexes file names with the extensions listed under File Types and ignore everything else. When you add a new file type, you then have to perform a full crawl to forcibly identify all files with the now relevant file extension.
References:
Adobe PDF iFilter 9 for 64-bit platforms
http://www.adobe.com/support/downloads/detail.jsp?ftpID=4025
Install and configure iFilters for SharePoint 2010 using PowerShell & updated PS SP2010 Utils
http://www.ravichaganti.com/blog/?p=1439
How to enable in-browser viewing of PDF documents (risky)
http://www.bluedoglimited.com/SharePointThoughts/Lists/Posts/Post.aspx?ID=328
If you are willing to accept the risk, do not set Brower File Handling to Permissive. This is a big hammer that opens up cross-site scripting problems for a wide variety of file types, not just PDFs.
What you need to do is “selectively” allow PDFs by setting specifying the right MIME type (and leaving Browser File Handling set to Restrictive). This can be done via the OM… and hence via PowerShell.
The PowerShell commands to do this is fairly straightforward:
$webapp = Get-SPWebApplication http://myWebApp
$webapp.AllowedInlineDownloadedMimeTypes.add("test/111")
$webapp.Update()
You’ll need to replace “test/111” with the appropriate mime type for the file you would like to enable. Likewise, you can remove items from the list by using the Remove command.
$webapp = Get-SPWebApplication <your webapp url>
$webapp.AllowedInlineDownloadedMimeTypes.Add(“application/pdf”)
$webapp.Update()


Discussion
No comments yet.